Thanksgiving Turkey Guide: Planning, Thawing & Roasting Tips
The centerpiece of any Thanksgiving feast, the roasted turkey, can seem like a daunting culinary challenge for many home cooks. Whether you're a first-timer feeling overwhelmed by the sheer size of the bird or a seasoned host looking for a reliable annual refresher, mastering how to cook turkey is the key to a stress-free and delicious holiday meal. This comprehensive guide will walk you through every essential step, from initial planning and safe thawing to achieving that coveted crispy skin and incredibly moist meat, ensuring your Thanksgiving dinner is a resounding success.
Planning Your Perfect Thanksgiving Turkey
Success in the kitchen, especially on a high-stakes day like Thanksgiving, begins long before the oven even preheats. Thoughtful planning can transform potential chaos into a smooth, enjoyable cooking experience. A well-orchestrated approach, much like the comprehensive strategies found in dedicated holiday cookbooks, helps you manage everything from ingredient procurement to oven space.
How Much Turkey Do You Need?
One of the first questions when preparing for a holiday gathering is always: how big of a turkey do I need? A good rule of thumb is to allocate approximately 1 to 1½ pounds of uncooked turkey per guest. If you're hoping for ample leftovers – a holiday tradition for many – it's always wise to lean towards the higher end of that estimate, perhaps even adding an extra pound or two. For instance, if you're hosting 10 guests, a 15-pound turkey should provide enough for the meal and some delicious next-day sandwiches or casseroles.
Selecting Your Turkey: Fresh vs. Frozen
When purchasing your turkey, you'll generally have two options: fresh or frozen. A fresh turkey requires less immediate prep as it doesn't need thawing, making it a convenient choice if you purchase it just a day or two before the big event. However, fresh turkeys can be more expensive and might have a shorter shelf life. Frozen turkeys, on the other hand, are widely available, often more economical, and can be purchased well in advance. The trade-off? They require careful and lengthy thawing, a critical step we'll cover next. Consider your timeline and budget when making this choice, but remember that either option can result in a magnificent bird if handled correctly.
The Importance of Meal Planning & Advance Prep
Beyond the turkey itself, the entire holiday meal requires a strategic approach. Consider this your holiday survival guide. Think about all the elements: appetizers, side dishes, stuffing, gravy, and desserts. Planning ahead allows you to:
- Optimize Oven and Refrigerator Space: Many dishes can be prepped or even fully cooked in advance, freeing up valuable appliance real estate on Thanksgiving Day.
- Create a Day-Of Timetable: Work backward from your desired serving time, noting when each dish needs to go into the oven, when the turkey needs to rest, and when final touches should be added.
- Delegate or Pre-Make: Can some side dishes be made by guests? Can you chop vegetables for stuffing or make cranberry sauce several days prior?
This proactive approach significantly reduces stress and ensures you have enough time to enjoy the celebration, rather than being stuck in the kitchen. For a more detailed walkthrough of orchestrating your entire holiday spread, check out our guide on Stress-Free Turkey: Your Complete Guide to a Delicious Holiday Feast.
The Crucial Step: Thawing Your Turkey Safely
If you've opted for a frozen turkey, proper thawing is non-negotiable. An improperly thawed turkey can cook unevenly and, more importantly, poses a food safety risk. The goal is to thaw your turkey slowly and in a cold environment to prevent bacterial growth while ensuring the bird is completely thawed to the core before it ever sees the oven.
Understanding Thawing Times
The time it takes to thaw a turkey depends entirely on its size. The general rule for refrigerator thawing (the safest and most recommended method) is approximately 24 hours for every 4-5 pounds of turkey. This means a 12-pound turkey would need about 3 days in the refrigerator, while a larger 20-pound bird could take 4-5 days. Always ensure your refrigerator temperature is set to 40°F (4°C) or below for safe thawing.
Safe Thawing Methods
- Refrigerator Thawing (Recommended): This is the safest and most reliable method. Place the frozen turkey, still in its original wrapper, on a tray or in a pan to catch any drips, and transfer it to the refrigerator. Allow ample time as outlined above. Once thawed, a turkey can remain in the refrigerator for 1-2 days before cooking.
- Cold Water Thawing (Emergency Method): If you're short on time, this method can work, but it requires more attention. Keep the turkey in its leak-proof wrapper and submerge it in a sink or large container filled with cold tap water. Change the water every 30 minutes to ensure it remains cold and to promote even thawing. Allow about 30 minutes per pound for this method. A 12-pound turkey would take approximately 6 hours. Cook the turkey immediately after it is thawed using this method.
Never thaw a turkey at room temperature on the counter. This allows the outer layers to warm up and enter the "danger zone" (between 40°F and 140°F) where bacteria multiply rapidly, long before the center of the bird is defrosted.
Preparing Your Turkey for Roasting
Once your turkey is fully thawed, the next steps are all about enhancing flavor and texture, setting the stage for that perfect golden, crispy skin and incredibly juicy meat.
Pre-Roast Prep for Flavor and Texture
For a truly exceptional turkey, many experienced cooks swear by a few key preparation techniques:
- Seasoned Butter Rub: A highly effective trick for achieving both crispy skin and moist, flavorful meat is to rub softened, seasoned butter all over the turkey, and critically, *under* the skin. Gently separate the skin from the breast meat with your fingers and generously spread a mixture of butter, herbs (like sage, thyme, rosemary), salt, and pepper directly onto the meat. This infuses flavor and helps the skin crisp up beautifully.
- Brining: Some home cooks opt for brining, soaking the turkey in a salt water solution before roasting. Brining can definitely contribute to a juicier bird, particularly if you tend to overcook poultry. However, it requires a large vessel and extra time and refrigerator space. While effective, many find the seasoned butter method sufficient for achieving moisture and flavor without the added logistical challenges of brining.
- Pat Dry: Regardless of your chosen prep, always pat the turkey thoroughly dry with paper towels just before roasting. Excess moisture on the skin prevents it from getting crispy.
Trussing and Stuffing Decisions
Trussing, tying the legs together and tucking the wings, helps the turkey cook more evenly and results in a neater presentation. It also helps to prevent the breast from drying out by exposing the thigh meat more to the heat. While optional, it's a technique worth considering if presentation is important.
Regarding stuffing, a common debate arises: to stuff or not to stuff the bird? Stuffing cooked inside the turkey absorbs delicious juices, but it significantly prolongs the cooking time for the turkey itself and requires the stuffing to reach a safe internal temperature of 165°F (74°C). For food safety and more even turkey cooking, many experts recommend baking stuffing in a separate dish. This allows the turkey to cook faster and reduces the risk of undercooked stuffing.
Mastering the Roast: Tips for a Juicy, Golden Bird
This is where all your planning and prep pay off. Roasting a perfect turkey involves understanding oven temperatures, cooking times, and most importantly, how to accurately determine when your bird is done.
Oven Temperature and Roasting Times
While specific roasting temperatures and times can vary slightly based on recipes and oven calibration, a common recommendation is to start your turkey at a higher temperature (e.g., 425°F for 30-45 minutes) to help crisp the skin, then reduce it to a moderate temperature (e.g., 325-350°F) for the remainder of the cooking time. General roasting times for an unstuffed turkey at 325°F are:
- 8-12 pounds: 2.75 to 3 hours
- 12-14 pounds: 3 to 3.75 hours
- 14-18 pounds: 3.75 to 4.25 hours
- 18-20 pounds: 4.25 to 4.5 hours
- 20-24 pounds: 4.5 to 5 hours
These are guidelines only; the real indicator of doneness is always the internal temperature.
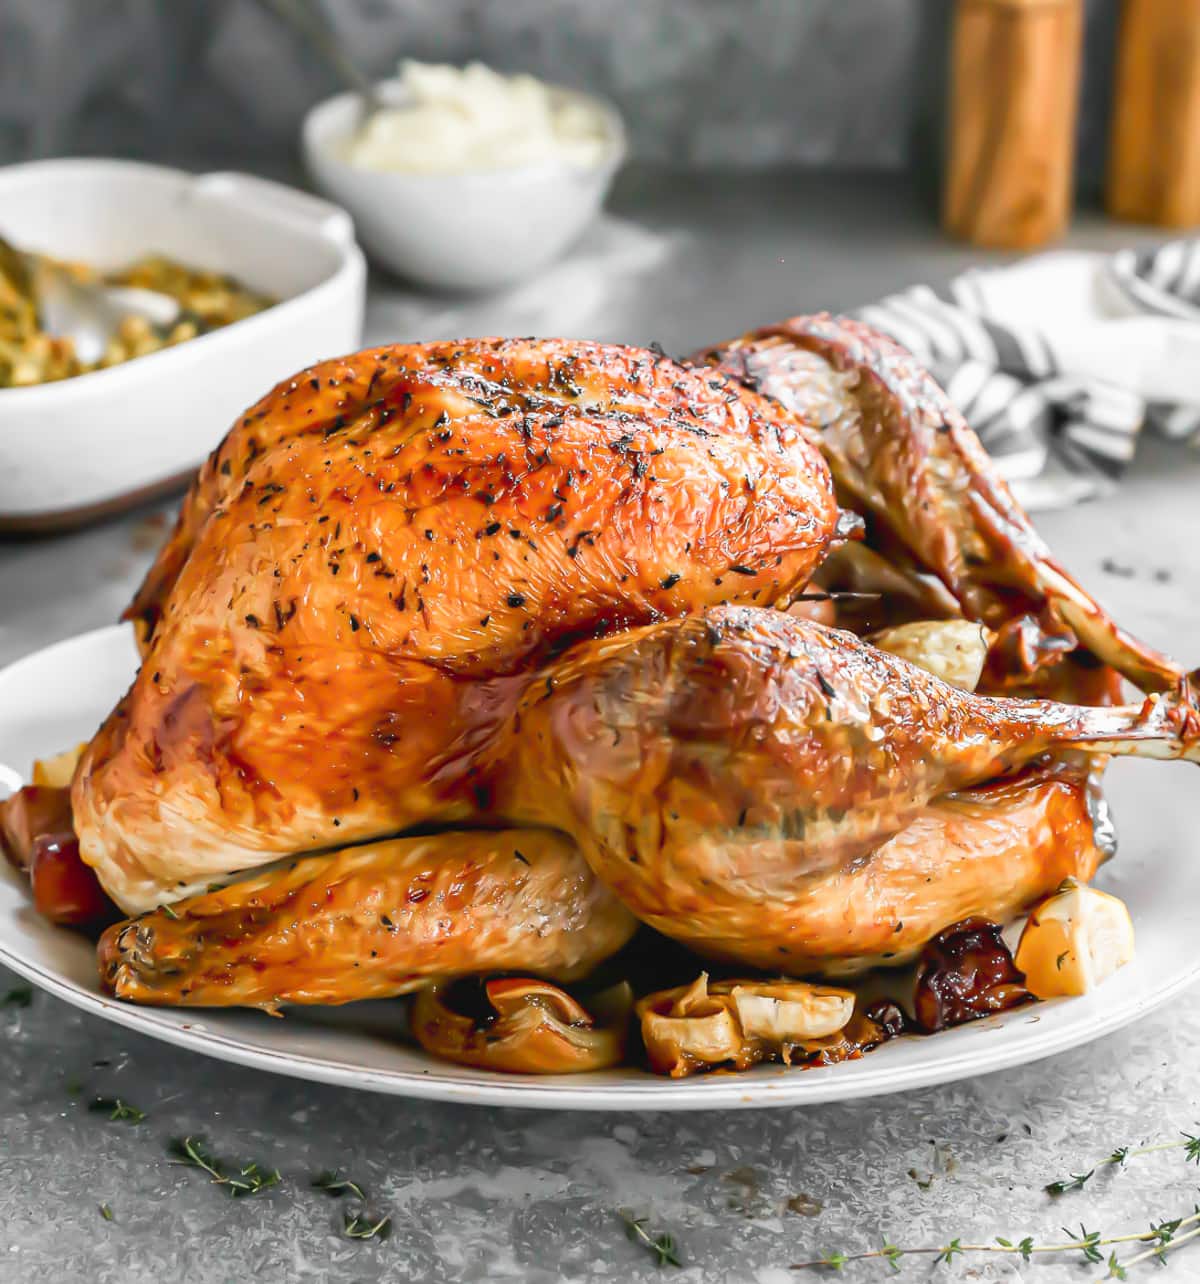
The Secret to Crispy Skin and Moist Meat
Beyond the seasoned butter rub mentioned earlier, several techniques contribute to that desired golden-brown, crispy skin and succulent interior:
- No Basting Needed (Often): While many assume basting is essential, continually opening the oven door drops the temperature and extends cooking time. The seasoned butter under the skin often provides enough moisture and fat. If you notice specific areas browning too quickly, you can loosely tent them with foil.
- Resting the Turkey: This is arguably one of the most critical steps for juicy meat. Once the turkey reaches its target temperature, remove it from the oven, transfer it to a cutting board, and tent it loosely with foil. Let it rest for at least 20-30 minutes (up to an hour for larger birds) before carving. This allows the juices to redistribute throughout the meat, resulting in a much more tender and flavorful bird.
For more detailed insights into achieving that perfect texture, be sure to read our article on Roast a Perfect Juicy Turkey: Crispy Skin, Moist Meat Every Time.
Testing for Doneness
The only truly reliable way to know if your turkey is cooked through and safe to eat is by using an instant-read meat thermometer. Insert the thermometer into the thickest part of the thigh, without touching the bone. The temperature should register 175-180°F (79-82°C). Also, check the thickest part of the breast; it should reach 165°F (74°C). If you stuffed your turkey, the center of the stuffing must also reach 165°F (74°C). If the turkey is done but the stuffing isn't, remove the stuffing and finish cooking it in a separate dish.
Beyond the Bird: The Complete Holiday Meal
While the turkey takes center stage, a full holiday feast is a symphony of flavors. Think about traditional side dishes like mashed potatoes, green bean casserole, and homemade cranberry sauce. The pan drippings from your roasted turkey are the base for an incredible homemade gravy – don't let them go to waste! Detailed instructions for transforming these flavorful drippings into a rich, smooth gravy can elevate your meal dramatically.
And when the feasting is done, the joy continues with leftovers. From turkey sandwiches to comforting soups or even inventive casseroles, planning for a "Continuing the Feast" section in your holiday menu ensures no delicious morsel goes unappreciated.
Conclusion
Learning how to cook turkey is more than just following a recipe; it's about understanding the process, planning ahead, and approaching the task with confidence. By following these practical tips on planning, safe thawing, meticulous preparation, and precise roasting, you'll demystify the art of turkey cooking. This Thanksgiving, empower yourself to roast a perfect, golden, juicy turkey that will be the highlight of your holiday table, leaving you free to savor the moments with family and friends.
