Stress-Free Turkey: Your Complete Guide to a Delicious Holiday Feast
The centerpiece of any holiday gathering, the grand turkey, can often feel like the most daunting part of the festive meal. Visions of dry meat, rubbery skin, or an undercooked bird can plague even seasoned home cooks. But fear not! This comprehensive guide is designed to demystify how to cook turkey, transforming it from a source of stress into a triumph of flavor. Whether you’re a first-time host or an experienced chef looking for a reliable annual refresher, we’ll walk you through every step to ensure your holiday feast is nothing short of spectacular. Get ready to impress your guests with a golden, juicy, and utterly delicious turkey that will be remembered for years to come.Laying the Foundation: Planning Your Perfect Turkey Dinner
Successfully mastering the art of how to cook turkey begins long before the oven even preheats. Careful planning ensures a smooth cooking process and a delicious outcome.Choosing the Right Size Turkey
The first crucial step is determining how much turkey you’ll need. A good rule of thumb is to allocate 1 to 1½ pounds of uncooked whole turkey per guest. Leaning towards the higher end (1½ pounds) is always a smart choice, guaranteeing plenty of food for everyone and, perhaps most importantly, ample leftovers for sandwiches, soups, and "Continuing the Feast" later in the week. Factor in whether your guests are hearty eaters or if you want substantial amounts for additional meals.Fresh vs. Frozen & Safe Thawing Techniques
Deciding between a fresh or frozen turkey often comes down to availability and preference. Fresh turkeys offer convenience as they don't require thawing, but they typically have a shorter shelf life. Frozen turkeys are widely available year-round and can be more economical. If you opt for a frozen turkey, **thawing it completely and safely is paramount** for even cooking and food safety. Never thaw a turkey at room temperature, as this allows harmful bacteria to multiply quickly. Here are the safest methods:- Refrigerator Thawing: This is the slowest but safest method. Allow approximately 24 hours of thawing time for every 4-5 pounds of turkey. Place the turkey, still in its original wrapper, on a tray or in a pan to catch any drips, and thaw in the refrigerator. A 15-pound turkey could take 3-4 days to thaw completely.
- Cold Water Thawing (Emergency Method): If you're short on time, this method is faster. Keep the turkey in its watertight wrapper and submerge it breast-side down in a sink or large container filled with cold tap water. Change the water every 30 minutes to keep it cold. Allow about 30 minutes per pound. A 15-pound turkey would take roughly 7-8 hours. Cook immediately after thawing.
Prepping Your Turkey for Roasting Success
Once thawed, the preparation phase is where you build the foundation for a truly flavorful and moist bird. This is where the secrets to how to cook turkey with crispy skin and juicy meat begin to unfold.To Brine or Not to Brine?
Brining involves submerging the turkey in a salty liquid (wet brine) or rubbing it with a salt mixture (dry brine) for several hours or overnight.- Pros: Brining introduces moisture and flavor deep into the meat, resulting in a more tender and juicy turkey, especially beneficial for the often-dry breast meat. It can also contribute to crispier skin.
- Cons: Wet brining requires a very large container and significant refrigerator space. Both methods add an extra step to the preparation process.
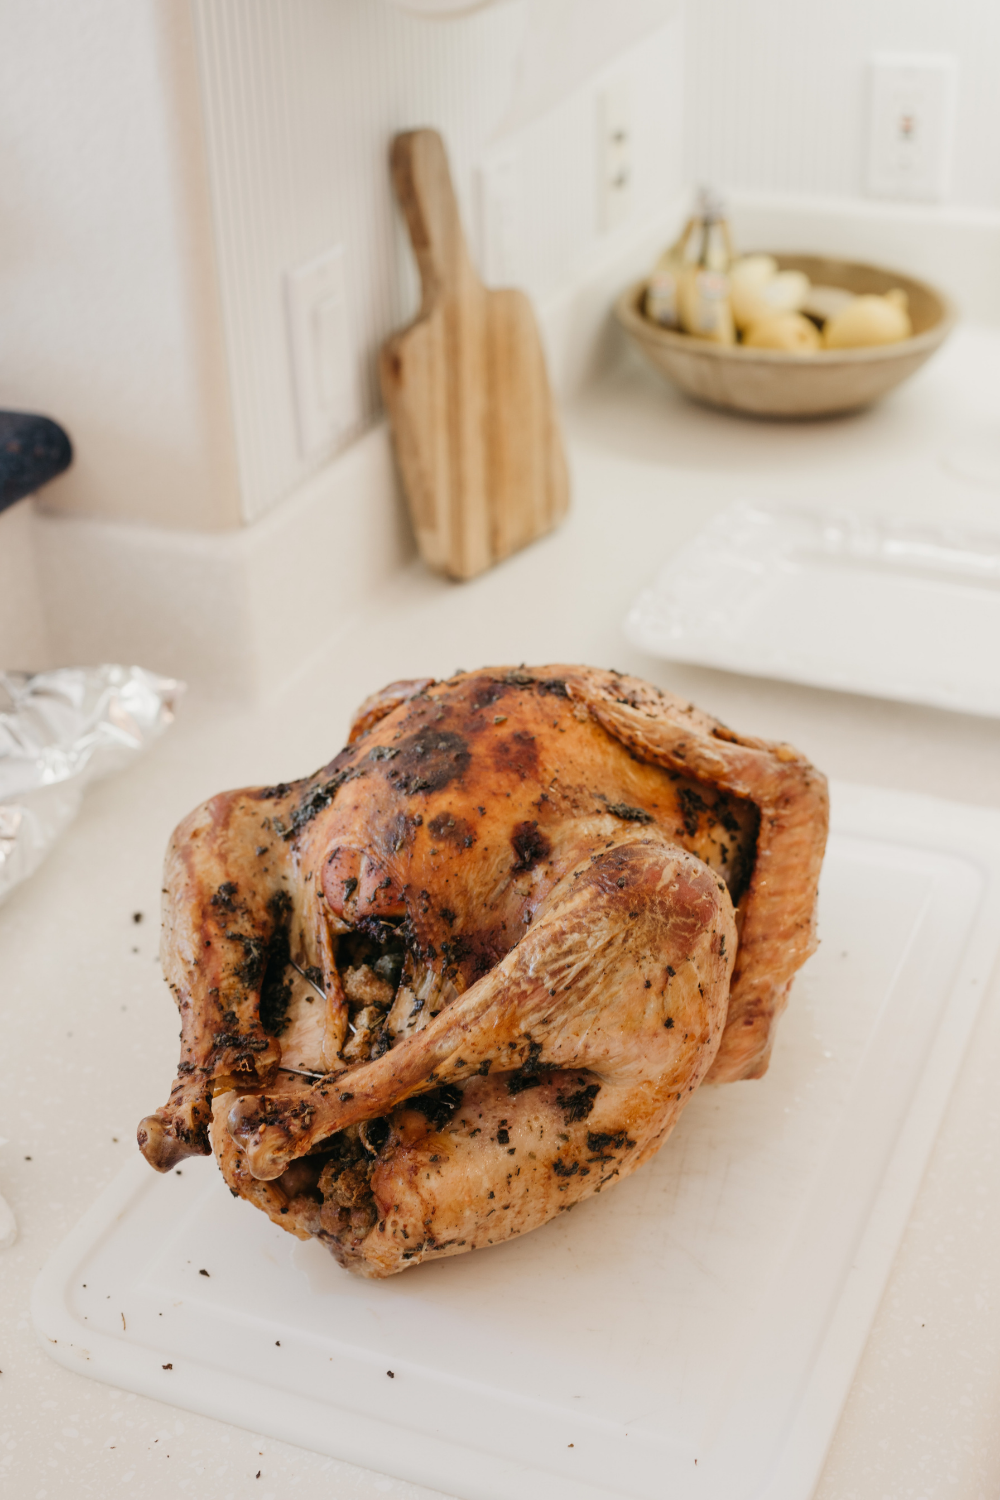
The Secret to Golden, Crispy Skin and Juicy Meat
One of the most valuable lessons in how to cook turkey for ultimate flavor comes down to a simple yet powerful technique: rubbing seasoned butter all over and under the skin. This creates an incredible barrier that locks in moisture while promoting a beautifully golden, crispy skin.To do this:
- Gently separate the skin from the breast meat using your fingers, being careful not to tear it.
- Mix softened butter with your favorite herbs (sage, thyme, rosemary), minced garlic, salt, and pepper.
- Spread a generous amount of this seasoned butter mixture directly onto the breast meat, under the skin.
- Rub any remaining butter over the outside of the turkey skin.
Trussing and Stuffing Considerations
Trussing (tying the legs together and tucking the wings) helps the turkey cook more evenly and presents a more aesthetically pleasing bird. While not strictly necessary for taste, it can make a difference in appearance and prevents wing tips from overcooking. When it comes to stuffing the turkey, a crucial safety note: if you cook stuffing inside the bird, it must reach an internal temperature of 165°F (74°C) to be safe. Often, by the time the stuffing reaches this temperature, the turkey meat itself can be overcooked and dry. For optimal safety and better turkey results, many experts recommend cooking stuffing separately in a casserole dish. You can still add aromatics like quartered onions, citrus halves, and herb sprigs to the turkey cavity for added flavor without the safety concerns.Mastering the Roast: How to Cook Turkey Perfectly
The moment of truth! Roasting the turkey is where all your preparation pays off. Understanding the right temperatures, cooking times, and doneness indicators is key to a flawless holiday feast. This section provides detailed instructions for how to cook turkey successfully.Choosing Your Roasting Method
While the classic oven roast is most common, various methods can yield fantastic results:- Classic Oven Roasting: The go-to for most home cooks. Typically involves starting at a higher temperature (e.g., 400-425°F or 200-220°C) for the first 30-60 minutes to crisp the skin, then lowering it (e.g., 325-350°F or 160-175°C) for the remainder of the cooking time.
- Grill-Roasting: For those who prefer to keep the oven free or enjoy a smoky flavor. Requires a covered grill with indirect heat.
- Boneless Turkey Breast: A great option for smaller gatherings or if you prefer to avoid dealing with a whole bird. Cooks much faster and is easier to carve.
Oven Temperatures and Cook Times
General guidelines for roasting a whole, unstuffed turkey at 325°F (160°C):- 8-12 lbs: 2¾ - 3 hours
- 12-14 lbs: 3 - 3¾ hours
- 14-18 lbs: 3¾ - 4¼ hours
- 18-20 lbs: 4¼ - 4½ hours
- 20-24 lbs: 4½ - 5 hours
The Ultimate Test: Doneness with an Instant-Read Thermometer
Forget guesswork or the "pop-up timer" that often comes with turkeys. The only reliable way to know your turkey is done and safe to eat is with an instant-read meat thermometer. Insert the thermometer into the thickest part of the thigh, without touching the bone. Also check the thickest part of the breast and, if stuffed, the center of the stuffing. Your turkey is done when:- The thigh reaches 165°F (74°C).
- The breast reaches 165°F (74°C).
- Any stuffing cooked inside the bird reaches 165°F (74°C).
